

The purpose of this blog is to provide a short explanation and guide on how and why to implement mobilization work into your training, and ultimately describe the approach and attitude I believe athletes should have towards mobilization. Mobilization is a broad term I use to represent physical techniques to restore and optimize, ranges of motion, muscular recruitment, and essentially the ability for the body to move. The modes of these exercises, will be familiar to you perhaps as stretching, or foam rolling etc, but to better emphasize the goal in treating this type of work as helping develop more optimal adaptations to better your skiing, we will use the umbrella term mobilization. Mobilization is training. Just as sleeping is a form of training, eating is training, and a threshold double pole workout is training, it’s goal is to help “train” you into becoming the best skier possible, specifically by increasing the active range of motions of your body, and teaching you neuromuscularly how to access these end ranges. Why would this make you a better skier? If you lack range of movement in some joint or the ability to lengthen and contract a specific muscle independently of others, your body will compensate with other movement, putting you out of an ideal position to create leverage and force. Training yourself to be able to move through the full range of your joints and recruit and relax muscles independently, allows you to control your body position, and actually have a chance at accessing the muscles needed to make the movement patterns of ski technique we work so hard to develop. For example, imagine you have zero hip flexion, your femur bones are fused into your pelvis in a standing position. Now, if you were to try and double pole you would have two compensatory options, flex above the hip at the next available option, which would be your lumbar and thoracic spine, or flex below the hip at the next joint which would be your knees, in order to put any type of force onto the poles. In either case it is physically impossible to leverage your center of mass forward and out in front of you to mechanically produce the maximum amount of force through your core and onto your poles. Obviously, this is an extreme example, but even slight deficiencies in your range of motion can become detrimental to technique, due to the dynamic movements of rotation, flexion, and extension of your body to extreme ranges and often under load, that are inherent to cross country skiing. Your range of motion does not allow you the chance to even put your body in these ideal positions that create and conserve the most force onto your poles and into moving you forward.
So how does one approach working on this?
I like to break down my mobilization practices into two goals. The first is finding my end ranges: myofascial release and the stretching of muscle fibers, ligaments, and tendons as I move my body to its end ranges. The next step is increasing, controlling, and making these end ranges active through isometric muscle work at these limits. This pushes the current range, while developing the ability to recruit muscles at these end ranges. This builds the neuromuscular control to reach this end range when moving, and actually use it by being able to stay active and produce force through it. These goals happen naturally together through this practice, but I like to always have this “why” in the back of my head to remind myself what I’m trying to accomplish and how I can improve from it.
1. A ball. I like a lacrosse ball, but a tennis ball would work or even something as big as a softball.
2. A place to move around
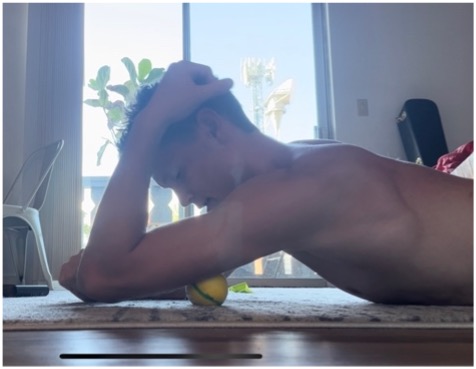
a. While on your back place the ball starting at what feels like the intersection of your neck and upper trap. We are “trapping” these fibers and then will use the expansion and contraction of your torso from the breath and movement of the shoulder to “stretch” and “release” these fibers.
b. Play around with movement and pressure. Bridge your hips up for up for more pressure. Rotate through putting your arms up, over your head, and through elevating, depressing, and protracting your scapula, finding the areas that are very sensitive.


c. Keep breathing! Breath into this pressure, using the expansion of your rib cage to stretch these fibers.
d. When you find a sensitive spot , inhale 4 seconds, do a 4 second isometric contraction of this muscle (tense it up), and then a 8 second exhale relaxing as deep as possible into the ball. Your body will realize it’s actually ok, and these fibers will let go. Goal is to be able to allow your full weight, completely limp, onto the ball, and then have the ability to contract the muscle. This is true control, and “owning a position.” You control the full function of this muscle, being able to turn it off and on, lengthening it and contracting it fully, and thus able to use it through its full range.
e. After 1 min move the ball to the middle of your trap (across towards the edge of your shoulder) and repeat the process. Finally, after another minute has passed, move the ball one more time further towards your shoulder (away from your neck) to what feels like where the trap attaches to the shoulder blade.
f. Repeat on other side
a. Laying on your side, place the ball on your side in the area where it feels like the arm comes into the scapula. This is essentially the seam of where your arm becomes your back.


b. Same process applies as above with the breath and movement of the arm. This time push the back of your hand and arm towards the floor, pushing the end range of your external rotation while “trapping” the rotator cuff muscles. This will stretch and lengthen these fibers.
c. When you reach a sensitive spot, breathe and do the routine as above: inhale 4 seconds, 4 second isometric contraction of this muscle (tense it up), and then 8 second exhale relaxing as deep possible into the ball, letting it go through you.
d. Once you feel like you “own” a spot, that is being able to let your full weight on it and then also being able to contract your muscle, find a new spot along this seam.
e. 2 min each side
a. While in a prone position, place the ball under your upper triceps. Your arm should be in external rotation, with the palm facing you. Put downward pressure and the weight of your body onto the ball through your triceps (smashing it), trying to reach the bottom.
b. Move the elbow through flexion and extension on the ball (like doing bicep curls)

c. Same breathing and contraction process as above when find sensitive spot: 4 second inhale, 4 second isometric contraction of this muscle (tense it up), and then 8 second exhale relaxing as deep possible into the ball, letting it go through you.
d. Once you feel like you “own” a spot, that is being able to let your full weight on it and then also being able to contract your muscle, move ball down towards elbow and repeat.
e. Make sure have time to get ball all the way down to intersection of the triceps and elbow. This is a very sensitive spot for skiers.

f. 2 min each side.
Being athletic is having access and control over the end ranges and shapes of the body. Maximum leverage, and therefore force, is produced at these end ranges and lengthened positions of your muscles, generating the most velocity and power through your body as you contract and move through them. Mobilization moves your body through the full range of mechanically ideal positions and shapes, allowing you to start to develop the control to implement them into your movement patterns, as you ski, run, jump, pull etc, ultimately, producing more force faster and more efficiently, during these movements and optimizing your athletic performance.
This philosophy of the importance of moving through and learning to control the end ranges of the shapes and positions of the body, in order to feel and move better, is something I first encountered from Dr. Kelly Starrett, who pioneered this approach to mobility and maintenance of the body. The exercises from this practice I borrowed from him. He has a subscription based app called The Ready State complete with a library of hundreds of mobilization practices, specific to all parts of the body, sports, and your movement goals, that I highly recommend. I use it almost every day and I really believe it has made me not only a better skier, but a better athlete in general. It’s been fun seeing and feeling myself gain of control and robustness over my muscles and my body like I have never had before, as I have implemented mobilization into my lifestyle, and how much better my skiing, running, balance, strength work and my overall athletic ability has become because of it.
Kelly’s brand/app: The Ready State